Published
- 3 min read
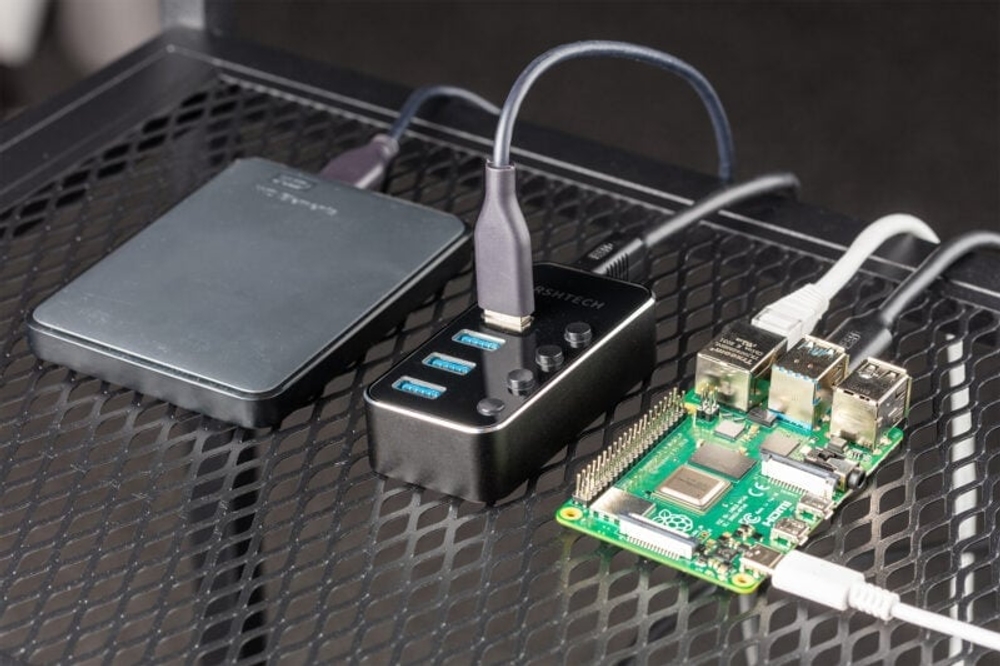
Build a Personal NAS Using Raspberry Pi and OpenMediaVault
Things Required
- Raspberry Pi 3 or above
- Ethernet cable and stable internet connection
- Power supply for Raspberry Pi
- External monitor (HDMI)
- Laptop or desktop
- Keyboard for Raspberry Pi
- External hard disk / SSD (for storage)
- Empty microSD card (for Raspberry Pi OS image)
Important Note (College / Enterprise WiFi)
When I originally built this project, I was in college using a corporate WiFi network with MSCHAP v2 authentication. If you are in a similar environment, avoid this method. College or enterprise WiFi often disconnects frequently and blocks many installation steps, which can waste a lot of time.
👉 Recommendation: Use a normal router with a direct Ethernet connection.
If you have: - A stable Ethernet connection - Power backup near the Raspberry Pi
You are good to go.
Step 1: Prepare the SD Card
1. Insert the microSD card into your laptop.
2. Download Raspberry Pi Imager from the official Raspberry Pi website.
- On Linux:
sudo apt install rpi-imager
3. Open Raspberry Pi Imager and configure:
- OS: Raspberry Pi OS (other) → Raspberry Pi OS Lite (32-bit)
- Storage: Select your SD card
4. Click the Settings (⚙️) icon:
- Enable SSH
- Set a strong password (do not forget it)
5. Click Write.
Wait until you see “Writing Complete” before removing the SD card.
Step 2: Boot the Raspberry Pi
Connect the following: - Ethernet cable (router → Raspberry Pi) - HDMI cable (Raspberry Pi → monitor) - Keyboard (mouse not required) - Power supply - Insert the SD card
Power on the Raspberry Pi. You will see boot logs scrolling on the screen.
At the login prompt: - Username: pi - Password: (the one you set earlier)
Step 3: Initial System Update
Run the following commands in order:
sudo apt update
sudo apt upgrade
ifconfig
From the ifconfig output, note down the inet IPv4 address. This is your Raspberry Pi’s network IP.
Step 4: Fix Keyboard Layout (Important)
By default, Raspberry Pi uses a UK keyboard layout, which can cause issues when typing special characters like |.
To change to US layout:
sudo raspi-config
Navigate to:
Localization Options → Keyboard → Other → English (US) → OK
Now the | symbol will work correctly.
Step 5: Install OpenMediaVault (NAS Software)
Run the following command exactly as shown (case- and space-sensitive):
sudo wget -O - https://raw.githubusercontent.com/OpenMediaVault-Plugin-Developers/installScript/master/install | sudo bash
⏳ This installation will take some time.
After installation, the DHCP server may assign a new IP address.
Run again:
ifconfig
Note the new IPv4 address.
Step 6: Access OpenMediaVault Web Interface
1. Open a browser on any device connected to the same network.
2. Enter:
http://<Raspberry-Pi-IP>
Default Login Credentials
• Username: admin
• Password: openmediavault
🔒 Immediately change the admin password:
System → General Settings → Web Administrator Password
Step 7: Connect and Mount Storage Disk
1. Plug your external HDD / SSD into the Raspberry Pi.
2. In the OpenMediaVault dashboard:
- Go to Storage → Disks
- Confirm your disk is detected
3. Go to Storage → File Systems
- Select the disk
- Click Mount
⚠️ Changes are NOT saved until you click Apply in the top bar.
Step 8: Create Shared Folder
1. Navigate to:
Access Rights Management → Shared Folders
2. Click Add:
- Select your mounted disk
- Set folder name
- Configure permissions
3. Click Save and then Apply.
Step 9: Enable Network File Sharing
Supported Access Methods
- Linux / macOS: NFS
- Windows: SMB (Samba)
Enable Samba (Windows)
1. Go to:
Services → SMB/CIFS
2. Enable the service
3. Go to Shares → Add
- Select the shared folder
- Configure permissions
4. Click Save and Apply
Step 10: Access NAS from Windows
1. Open This PC
2. Right-click → Add a Network Location
3. Enter the path:
\\<Raspberry-Pi-IP>\<Shared-Folder-Name>
- When prompted: Username: pi
- Password: Set this under:
Access Rights Management → Users
Once logged in, you can upload, download, and manage files like a normal drive.
Final Result
🎉 You now have a fully functional personal NAS / internal server accessible from any device on your network.
Credits
Inspired by
Inspired by NetworkChuck