Published
- 5 min read
From Simulator to First Flight: A Complete FPV Drone Building Journey
Introduction
FPV — First Person View — drone flying is one of the most exciting, technical, and rewarding hobbies you can pursue. It blends hands‑on building skills, real‑time piloting, strategic learning, and creative expression via freestyle flight.
Unlike toy drones, FPV racing and freestyle quads let you see through the drone’s eyes, perform acrobatics, navigate courses, and develop real motor coordination and engineering skills.
But getting into FPV can feel confusing at first. There are many parts, unfamiliar terms, and a bit of a learning curve. This guide helps you take a clear path: from simulator practice to building and flying your own freestyle drone.
Step 1 — Understand the Basics of FPV
Before buying anything, you need to understand the ecosystem:
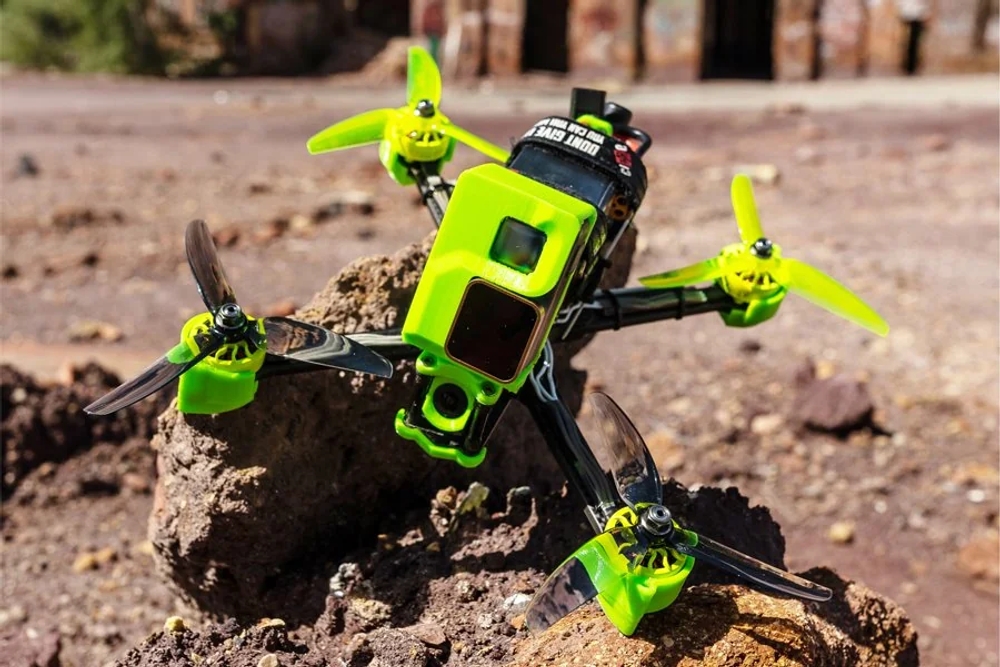
- FPV Drone: A small quadcopter equipped with FPV camera, video transmitter, motors, flight controller, and battery.
- FPV Goggles: These let you see in real‑time what your drone sees.
- Radio Transmitter (Controller): Sends piloting commands to the drone.
- Simulator: A software tool where you practice flying without risk of crashes.
Think of this like learning to drive: first you use a simulator, then you learn the controls (radio), then you build and drive your first car (drone).
Step 2 — Practice With a Simulator
Why Simulator First?
Flying an FPV drone is unlike flying a toy drone. You control pitch, roll, yaw, and throttle independently, and mistakes crash drones — which cost money.
A simulator lets you:
- Learn controls without crashing hardware
- Build muscle memory in your thumbs
- Practice when weather or daylight isn’t good
- Try different drone setups
What You Need
To practice:
- FPV Goggles (or sometimes a monitor)
- Radio Transmitter / Controller
- Simulator Software (like VelociDrone or Liftoff)
Recommended Setup
| Component | Recommendation |
|---|---|
| Simulator | VelociDrone (very realistic physics) |
| Goggles | FPV goggles with simulator support |
| Transmitter | Radiomaster TX16S or similar |
Practice Routine:
- 1st week: learn basic throttle control and hovering
- 2nd week: figure 8s, slow turns
- 3rd week: altitude changes, power circuits
- 4th week: freestyle moves, simulated racing lines
After ~1 month of simulator practice, your thumbs, eyes, and brain will start acting in sync — and you’ll be ready to build.
Step 3 — Choosing Your First Freestyle Drone Components
Here’s a real budget‑based parts list you provided, refined for clarity:
| Parts | Model/Type | Approx Cost (₹) |
|---|---|---|
| Frame | TBS Source One V3 | 2500 |
| Motors | Xilo / Emax (1700KV or 2400KV) | 6400 |
| Flight Controller Stack | Speedybee / Mamba | 13500 |
| Transmitter Receiver + Antenna + Camera | FPV stack | 20000 |
| Radio Controller | Radiomaster TX16S Hall gimbal ELRS | 19000 |
| FPV Goggles | Good quality kit | 55000 |
| Battery | 2600 mAh LiPo | 6000 |
| Propellers | Set of props | 1000 |
| Heat Sinks | Motor/ESC cooling | 150 |
| Soldering Machine | Tool you’ll use often | 1600 |
| Zip Ties | Small accessories | 200 |
| Simulator | VelociDrone license | 1600 |
| 3D Prints | Optional mounts | 1000 |
| Total Budget | — | 127,950 |
Note: This total (~₹1.28 lakh) includes essential tools and parts. You can reduce costs by reusing components, buying used parts, or starting with a smaller basic setup. But this set gives a balanced freestyle drone experience.
Step 4 — Learn the Parts
Frame
The skeleton of your drone:
- Holds all components
- Determines durability and size
- Thruster layout affects flight style
Example: TBS Source One V3 — popular, rugged for freestyle.
Motors
Motors provide thrust.
Higher KV = faster prop spin, more punch; lower KV = smoother control.
Recommended: 1700KV–2400KV depending on weight and flying style.
Flight Controller & Stack
This is the brain:
- Runs firmware like Betaflight
- Interprets your control inputs
- Stabilizes the quad
Good stacks simplify setup and tuning.
FPV Camera + VTX + Receiver
- FPV Camera: Sends live visuals to goggles
- VTX: Transmits video signal
- Receiver/ELRS: Receives your radio controller signals
ELRS (ExpressLRS) is fast, low latency — perfect for FPV.
Radio Controller
Your physical sticks.
Radiomaster TX16S is versatile, long‑range capable, and supports many protocols.
FPV Goggles
These immerse you in the drone’s view.
Quality and comfort matter a lot — they make flying intuitive.
Step 5 — Build Your First Drone
Building a drone is logical and methodical:
-
Mount the frame
Attach stack and arms. -
Install motors
Correct orientation and secure screws. -
Wire electronics
Solder ESCs → motors
Connect FC stack → VTX → Camera
Connect receiver -
Antenna placement
Proper antenna placement reduces crashes due to signal loss. -
Battery strap and placement
Balance matters: front‑to‑back and left‑to‑right. -
Prop installation
Ensure props spin in correct directions (CW/CCW). -
Firmware & Tuning
Flash Betaflight or similar firmware
Adjust PID and rates for smoother freestyle
It sounds complex, but many builders find the first build is educational and your confidence jumps after it.
Step 6 — First Real Flights
Once built:
- Start with hover testing
- Work on slow movements
- Keep altitude moderate
- Practice simple circuits
- Video record for later self‑review
Don’t compare yourself to others — every pilot’s journey begins with shaky takeoffs and nervous landings.
Step 7 — Progression and Discipline
This hobby rewards consistent practice:
- Simulator nightly for 30–45 min
- Real flight sessions on weekends
- Tuning your build, checking logs
- Learning crash repairs
Many pilots treat FPV like music, sports, or martial arts — progress comes from repetition, reflection, and resilience.
Safety First
- Always check props
- Ensure radio failsafes configured
- Fly in open safe areas
- Never fly near crowds, roads, aircraft
- Wear eye protection
Safety is part of discipline — and it keeps your hobby sustainable.
Why This Hobby Changes You
Flying FPV and building your own drone teaches:
- Technical problem‑solving
- Soldering and electronics
- Spatial judgment and hand‑eye coordination
- Calm under pressure
- Structured practice
This is more than a hobby — it’s growth, patience, and doing hard things.
Closing Thoughts
From simulator practice with goggles and a controller to building your first quad from scratch, this journey is a zero to hero path:
- Start with simulator
- Understand hardware
- Build your drone
- Fly and improve
- Repeat, refine, innovate
FPV freestyle drones are a blend of creativity and precision. With consistency and curiosity, you’ll not only fly — you’ll master.
Stay focused, keep learning, and enjoy every crash and fix — that’s the real path to mastery.
References & Resources
- VelociDrone Simulator – https://www.velocidrone.com
- ExpressLRS Documentation – https://www.expresslrs.org
- Betaflight Guide – https://betaflight.com
- FPV YouTube Tutorials (Joshua Bardwell, UAV Coach, etc.)